Threading of a sewing machine might appear overwhelming for you if you are a beginner, and it may even put you off sewing entirely. However, following the correct procedure incorporated with a few smart tricks will be a piece of cake.
Preparation Before Starting
Start by flipping through your sewing handbook. It should provide guidelines for threading your specific machine. If you’ve misplaced your handbook, you may get sewing machine manuals online.
You’ll need to configure your sewing machine before you can create your first stitch. While the basic setup of a sewing machine may appear daunting at first, it will become incredibly easy after just a few sewing jobs.
Always go for high-quality threads. Your threads should be appropriate for the cloth you’ve chosen. Wrap the bobbin with the colored thread you would like to use.
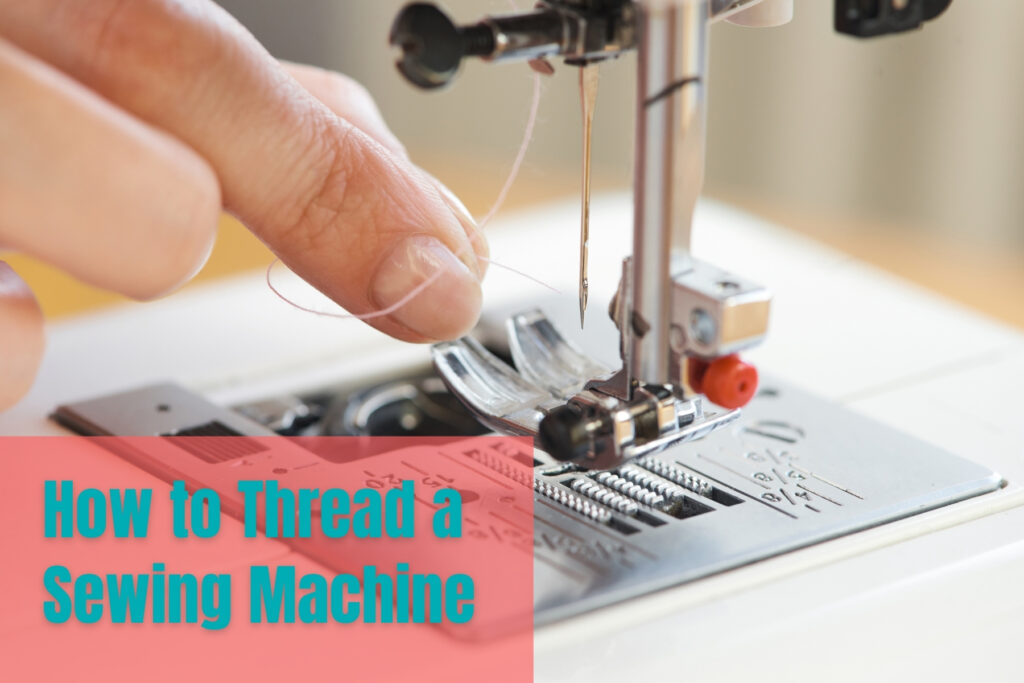
How to Thread a Sewing Machine
- Place the cotton on the spool at the machine’s top. This might be a vertical or a laying down pin, according to your equipment.
- Your sewing machine may come with a plastic plate to attach to the top of the spool to keep it stable and prevent it from blowing off after you begin stitching.
- Run the threads through the upper thread guide. The machine includes two deep grooves. They reduce noise and friction and allow high rotational speed. The next step is to insert the thread into a deep groove on the front of the machine. Then up into the second deep groove, situated close to the left of the machine.
- At the top of the machine’s second groove is a metal section called the take-up lever. It’s the component of the device that feeds the thread through the machine by pulling it from the spool and then lifting it out of the material after each seam. Simply defined, it’s the component of the machine that sews goes upwards and downwards.
- The next step is to wrap the thread around the thread take-up lever. Run your thread all the way back down to the hole of the sewing machine needle, and thread it backward. Feed the thread’s end through the needle hole until there is just a little left.
- You will find a bobbin placed on the top of your machine. It feeds the stitching thread from the machine’s lower section and keeps the strand underneath the needles. Some machines have a removable bobbin case while some have it fixed.
- You need to add your bobbin and top thread according to the settings of your machine and the manual provided.
- Finally, try the method on a piece of cloth to test your stitching and stiffness on a strip of cloth. When you begin stitching, gently hold the threads at the rear to avoid tangles between the upper and bottom strands. Ensure to lower the foot to link with the feeding mechanism and keep the cloth stable.

Tips and Tricks for Thread a Sewing Machine
Threading
- Snip the tip of the strand. It’s possible that the fuzzy pieces at the tip of your threads are interfering as you attempt to wind it through the needle’s eye. Clip the end off – cutting at an angle will make it much simpler to get it through the little hole. Any frayed string tips can be sealed by wetting your fingertips and firmly squeezing the tip of the string with your moist fingers.
- Light up the room. The needle’s eye is so small that threading it in a dark or gloomy room is nearly impossible. Use a reading light or your device’s flashlight mode to add some more light.
- Draw attention to the needle’s eye. By placing your fingertip behind the needle’s eye, you should really be able to see precisely where you’re trying to enter the thread.
- Choose a threader that threads the needles automatically. There are devices if everything else fails! An automated needle threader is incorporated with many sewing machines. When it comes to needles, make sure you use the right one for the job.
- Each piece of clothing requires a specific type of needle. Universal needles are useful in a variety of circumstances, but they aren’t always the ideal option. Trousers, for instance, could be your go-to outfit, but they demand more than just a regular needle!
- Needles can also grow rusty or curved in a short period of time. This can cause string tangles or, even worse, the needle colliding with the needle plate rather than passing through the hole, causing it to break off repeatedly. Needles should be changed on a frequent basis for cleaner and effective sewing.
Stitching
- Maintain a clean appearance by keeping your lines straight and your curves smooth. Begin gently and gradually build up your pace as your confidence grows.
- Always concentrate on the symmetry rather than the needle or sewing; they shift too quickly for your vision to keep up with, and it stops you from seeing the broader image.
- Sew gently while turning the cloth with both hands to create a smooth arc. If you can, stitch in a smooth, swift motion; always come to a complete halt with the needle buried into the cloth. This will enable you to rotate the cloth around the last seam, resulting in a beautiful arc.
Threads
- Use threads that are similar. Two threads are used in a sewing machine. To minimize unequal pressure, knots, and malfunctions, use the same kind of threads, similar material, same texture on the upper and lower part.
- You may combine colors to complement the inner and outside fabrics, or make ornamental embroidery, as long as the thread is the same type.
- Maintain the ends of the strands in your hands. Whenever you start stitching, the ends of the strands are slack. This can entangle them up in the device’s mechanism, causing them to drag the cloth in with them.
- Always keep the thread ends in your left hand when sewing the initial knots to prevent a tangle.
- Rethreading is an important part of machine maintenance. Consider rethreading if you are unable to get the tension correct, or if the thread keeps jamming or breaking, or if you think something is off with the spool or bobbin.
- This will help fix any issues you may face while stitching. Check to see whether you have enough thread. Monitor the availability of your spool before beginning a new piece or a large section of a project.
- Ensure there are enough threads on it so you don’t get cut off in the mid of a nice stitch or a difficult embroidery.
- If the spool is relatively empty, it’s a good practice to replace it right away than dealing with it later.
Fabrics
- Before stitching, smooth out your fabrics. By straightening the cloth before stitching, you may minimize the uneven strokes that result from stitching crumpled-up material. If that isn’t enough, just flatten out every line (including the tidy folded one) with your palms, or iron it if necessary. It will take a little more effort at first but simplify the job in the long run.
- Save up little scraps of fabric. You can practice a few stitches and they may also be used for personal projects or to lend a unique touch to bigger ones.
Machine
- Tidy your equipment on a regular basis. Whenever you stitch, the fuzz gets trapped in the machinery. It can have an influence on the functioning and vibration intensity of your equipment.
- It’s also a smart option to wrap your machine to keep it dust-free.
- You might be able to avoid a visit to the service center if you maintain your machine properly.
- Handling a sewing machine is similar to driving a vehicle. In the sense, that the accelerator must be operated smoothly.
- Don’t yank it all the way back down all at once (or risk completely losing control of your stitching). For accurate maneuvers, go slowly. Maintain a steady pace of exercise.
- A variable speed lever is found on much-computerized equipment, allowing you to specify a top speed. It’s ideal for novices or those who have sensitive pedals.
- Another technique is to stitch while barefoot. The increased sensitivity aids in foot grip.
Practice
- Sewing on paper as a warm-up. It’s exciting to dive in and start working straight away. However, keep in mind that each cloth, string, and pattern has its own unique qualities. Varied strands present unique tensions: thin cloth might be delicate, while dense fabric necessitates a heavy, powerful needle; stitching come in a variety of forms and sizes; and so on.
- You can make modifications without damaging your work by practicing on a scrap of cloth for a few minutes. Certainly, you’ll need to replicate the settings of your project in order for it to ring true. Therefore, for your trial and your work, use the same material, threading, and equipment setup.
- Complete beginners can practice as well. To just get the knack of it, absolute novices might experiment on a paper sheet first. There is a plethora of complimentary templates published online that you may print out at house and practice using.
Frequently Asked Questions
How do you set a sewing machine needle in the right direction?
Answer: The string will always go from front to back of the needle. Slip the thread through the eye of the needle without rotating or distorting it.
Why is threading a sewing machine so difficult?
Answer: To begin, make sure you’re using a high-quality thread. Low-quality thread unravels easily, makes it more difficult to work with. Additionally, the top and lower threads should be the same kind. You’ll have tension issues and possibly jams if you don’t.
How to fix bunched bobbin threads and other threading issues?
Answer: Make sure the machine is properly threaded. Rethread the upper section of the sewing machine, ensuring that the thread passes through each and every thread guide on its route to the needle.
- Replace the Needle.
- Examine the bobbin.
- Take care of the machine.
Why does my thread constantly getting tangled up?
Answer: It’s possible that the tension is too tight or too slack. Lock the tightness to the default thread tension or manually change the tension. The needle length, string girth, and material mix are all wrong. Make sure you’re using the right needle and thread for the cloth you’re stitching.
Final Words
The most fundamental step is to set up your sewing machine carefully. Throw some helpful hints to make the process go more smoothly, and your connection and experience with your sewing machine might be transformed completely.